Sidewalk Paver Contractors

Sidewalk paver contractors are essential for transforming outdoor spaces. From initial design consultation to final installation and maintenance, selecting the right contractor is crucial for a successful project. This guide explores the entire process, from finding qualified professionals and planning your project to understanding costs and ensuring long-term satisfaction with your new pavement.
We will cover key aspects such as contractor qualifications, project planning, installation techniques, maintenance strategies, and legal considerations. Understanding these elements will empower you to make informed decisions, leading to a beautiful and durable paved area that enhances your property for years to come.
Finding Reputable Sidewalk Paver Contractors
Locating qualified and reliable sidewalk paver contractors is crucial for a successful project. This involves utilizing various resources and employing effective search strategies to identify contractors with the necessary experience and expertise. Careful vetting during the initial contact phase is also essential to ensure a positive outcome.
Resources for Locating Contractors
Several resources can help you find reputable sidewalk paver contractors. Online directories such as Angie’s List, HomeAdvisor, and Yelp often feature contractor profiles with reviews and ratings. Professional associations, like the Interlocking Concrete Pavement Institute (ICPI), can provide referrals to certified contractors in your area. Local community forums and neighborhood websites also frequently have recommendations from satisfied customers.
Search Query Strategies
Effective search queries are essential for finding local contractors. For example, using search engines like Google, Bing, or DuckDuckGo, try variations such as “sidewalk paver contractors near me,” “best paver installers [your city/zip code],” or “[type of paver] installation contractors [your city/zip code]”. Including specifics related to your project, such as “brick pavers” or “permeable pavers,” can refine your search results.
Initial Contact Questions
When contacting potential contractors, ask about their licensing, insurance coverage, years of experience, and the types of projects they have completed. Inquire about their process for project management, communication, and handling unforeseen issues. Request references from past clients to gauge their customer satisfaction and overall work quality. Asking about their approach to safety and adherence to building codes is also important.
Contractor Qualifications and Selection
Selecting the right contractor is paramount to a successful project. TA’s thorough evaluation of qualifications, bidding processes, and contract review is necessary to ensure a smooth and satisfactory experience.
Key Contractor Qualifications
Look for contractors holding relevant licenses and certifications, such as those offered by the ICPI. Adequate liability and workers’ compensation insurance is crucial to protect you from potential financial risks. Review the contractor’s portfolio, focusing on projects similar in scale and complexity to your own. Check online reviews and request references to assess their reputation and customer satisfaction.
Contractor Bidding Processes
Sealed bids involve submitting proposals with fixed prices, allowing for easy comparison. Negotiated bids involve discussions and potential adjustments based on specific project needs. Both methods have advantages and disadvantages; sealed bids offer transparency while negotiated bids allow for greater flexibility. Choosing the right method depends on the project’s scope and your comfort level.
Essential Documents Review Checklist
Before hiring a contractor, carefully review their contract, ensuring it Articulates the scope of work, payment schedule, timelines, and dispute resolution procedures. Verify their insurance certificates to confirm adequate coverage. Check references to confirm their past performance and client satisfaction. Request a detailed breakdown of the project costs, including materials, labor, and permits.
Project Planning and Design
Meticulous planning and design are crucial for a successful sidewalk paver project. This includes conceptualizing the design, selecting appropriate materials, and preparing the site for installation.
Project Planning Steps
Begin by defining the project scope, including the size, shape, and location of the paved area. Develop initial design concepts, considering aesthetics, functionality, and drainage. Select appropriate paver materials based on budget, durability requirements, and aesthetic preferences. Ensure proper site preparation, including excavation, grading, and base installation, to ensure a stable and level surface.
Sample Project Timeline
A typical sidewalk paver project timeline might include: initial consultation (1 week), design and material selection (2 weeks), site preparation (1 week), paver installation (2-3 weeks), and final inspection (1 week). This timeline is an estimate and may vary depending on project size and complexity.
Paver Material Comparison
| Material | Pros | Cons | Cost (Estimate) |
|---|---|---|---|
| Concrete | Durable, versatile, relatively inexpensive | Can crack under stress, less aesthetically diverse than other options | $5-$15 per square foot |
| Brick | Aesthetically pleasing, durable, wide range of colors and styles | More expensive than concrete, and requires more precise installation | $10-$25 per square foot |
| Stone | High durability, natural beauty, unique character | The most expensive option requires skilled installation | $15-$40+ per square foot |
| Permeable Pavers | Environmentally friendly, reduces runoff, improves drainage | More expensive than traditional pavers, and may require specialized installation | $12-$30+ per square foot |
Installation Process and Techniques
The installation process involves several key steps, from site preparation to final finishing, ensuring a durable and aesthetically pleasing result.
Installation Steps
The process typically includes excavation, base preparation (compacting gravel base), installation of edging, laying pavers in a chosen pattern, compacting the pavers, and adding joint sand. Proper drainage is essential, achieved through appropriate grading and the use of permeable base materials. The final steps include cleaning and sealing the pavers to protect them from weathering and staining.
Creating Patterns and Designs
Various patterns and designs can be created using different paver types, sizes, and arrangements. Simple patterns like running bond or herringbone are straightforward, while more complex designs may require specialized planning and skilled installation. The use of contrasting colors or materials can add visual interest.
Ensuring Proper Drainage and Preventing Settling
Proper grading and base preparation are crucial for preventing settling and ensuring adequate drainage. Using a compacted, well-drained base material and maintaining consistent paver spacing prevents water accumulation and frost heave, extending the lifespan of the pavement.
Maintenance and Repair
Regular maintenance is vital to prolong the life and aesthetic appeal of your sidewalk pavers.
Maintenance Schedule
Regular cleaning using a broom and water removes debris and prevents staining. Sealing the pavers every few years protects against weathering and staining. Weed control, either through hand-weeding or the application of herbicide, prevents unwanted plant growth.
Common Problems and Solutions
Cracking can be caused by frost heave or settling. Repair involves removing the damaged pavers and replacing them with new ones. Settling can be addressed by lifting and re-compacting the pavers. Weed growth can be controlled through regular weeding and application of appropriate herbicides.
Repairing Damaged Pavers
Repairing damaged pavers involves carefully removing the affected pavers, preparing the base, and installing new pavers of the same type and color. Ensure the new pavers are properly compacted and the joint sand is replenished to maintain a level and stable surface.
Cost Considerations and Budgeting
Understanding the cost breakdown and creating a realistic budget is crucial for managing your sidewalk paver project effectively.
Cost Breakdown
Source: ytimg.com
Costs include materials (pavers, sand, gravel, edging), labor, permits, and any additional expenses like site preparation or removal of existing pavement. The cost varies significantly depending on project size, material choices, labor rates, and location.
Sample Budget Template

Source: pinimg.com
A budget should include detailed cost estimates for each component of the project. For example, an 1100-square-foot project might cost between $1000 and $5000, depending on the chosen materials and labor costs. Larger projects will naturally have proportionally higher costs.
Factors Influencing Cost, Sidewalk Paver Contractors
Project complexity, site conditions (e.g., slope, existing landscaping), material choices (premium materials are more expensive), and labor rates all significantly influence the overall project cost. Unexpected issues or changes to the project scope can also add to the expense.
Legal and Regulatory Aspects

Source: sequoiastonescapes.com
Navigating the legal and regulatory aspects of sidewalk paver projects is crucial for compliance and avoiding potential issues.
Permits and Approvals
Most jurisdictions require permits for sidewalk paver installations. Check with your local building department to determine the necessary permits and approvals. These may vary depending on the project’s location, size, and proximity to utilities.
Common Legal Issues
Liability for damages during installation or due to faulty workmanship is a key concern. Ensure your contractor has adequate insurance. Compliance with building codes and local regulations is also vital to avoid legal repercussions.
Contractor and Homeowner Responsibilities
The contractor is responsible for obtaining permits, ensuring safe working practices, and delivering quality workmanship. The homeowner is responsible for providing clear project specifications, securing necessary approvals, and making timely payments. Open communication and a clearly defined contract are essential to avoid disputes.
Visual Representations
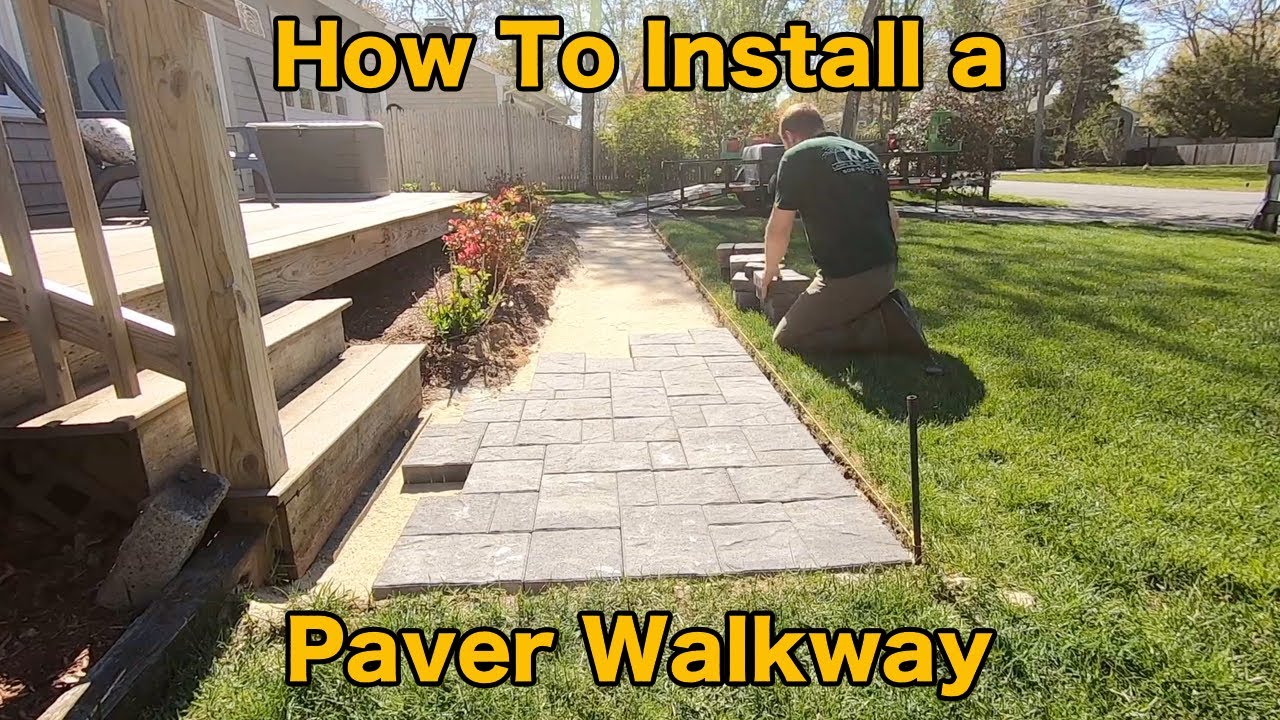
A professionally installed sidewalk presents a visually appealing and functional surface.
Appearance of a Well-Maintained Surface
Source: homedit.com
A well-maintained sidewalk displays a consistent color and texture, with pavers laid in a neat and even pattern. Edging provides a clean, finished look, and the overall surface is free of weeds, cracks, and settling. Various edging options, such as concrete, brick, or metal, can complement the pavers and enhance the overall aesthetic.
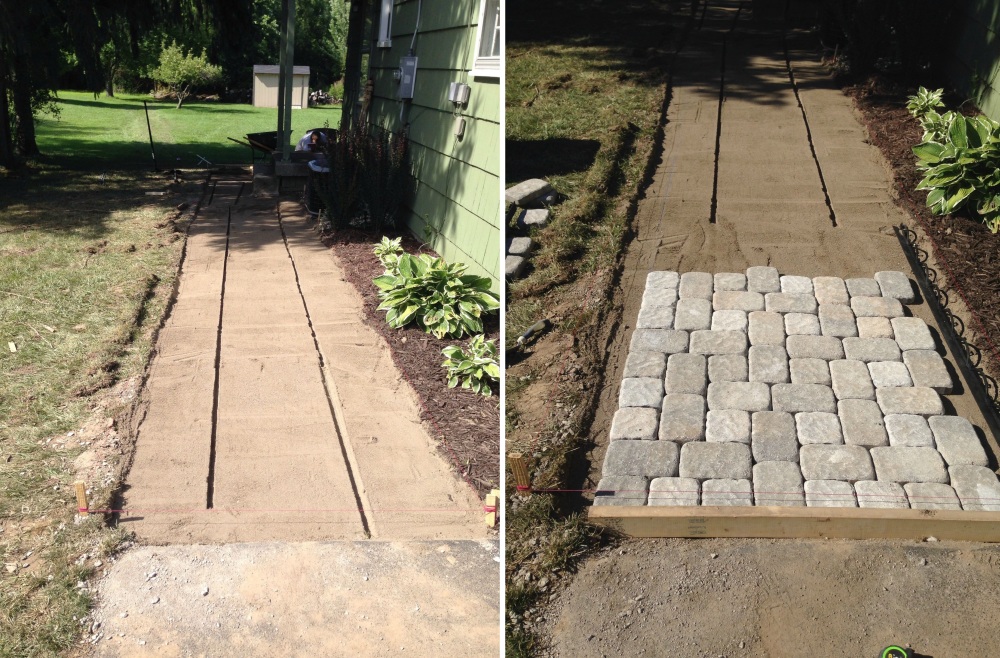
Before-and-After Scenario
Imagine a neglected walkway, overgrown with weeds and showing signs of deterioration. After professional installation, the same walkway transforms into a beautiful, functional space, featuring a vibrant pattern of brick pavers, clean lines, and an inviting atmosphere. The new surface significantly enhances the curb appeal of the property, creating a welcoming and aesthetically pleasing entrance.
Q&A
How do I find local contractors’ reviews and testimonials?
Check online review platforms like Google My Business, Yelp, and Angie’s List. Look for consistent positive feedback and a substantial number of reviews.
What is the typical timeframe for a sidewalk paver project?
The timeframe varies depending on project size and complexity but typically ranges from a few days to several weeks.
What kind of warranty should I expect from a contractor?
Reputable contractors offer warranties covering workmanship and materials for a specified period, usually one to two years.
How often should I seal my pavers?
Sealing frequency depends on the paver material and climate, but typically every 2-3 years is recommended to protect against staining and weathering.
Are there any specific permits needed for a sidewalk paver project?
Permit requirements vary by location. Check with your local building department to determine the necessary permits before starting the project.
Comments are closed.