Decomposed Granite Walkway Installation
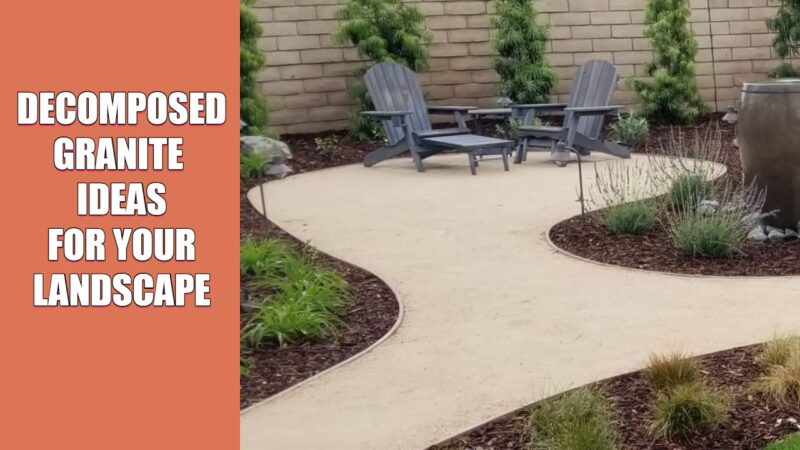
Decomposed granite walkway installation offers a charming and cost-effective alternative to traditional paving. This guide delves into every aspect of the process, from meticulous planning and material selection to the intricacies of installation and long-term maintenance. We’ll explore various design options, address common challenges, and provide practical tips to ensure a beautiful and durable walkway that enhances your landscape for years to come. Whether you’re a seasoned DIY enthusiast or a first-time installer, this comprehensive guide will equip you with the knowledge and confidence to complete your project.
We will cover the key stages, including site preparation, material selection, the installation process itself, and finally, ongoing maintenance. Understanding these steps will not only lead to a successful installation but also ensure the longevity and aesthetic appeal of your new walkway. We’ll also examine different design layouts, budgeting considerations, and ways to minimize environmental impact, ensuring a holistic approach to your project.
Project Planning & Design

Source: ytimg.com
Careful planning and design are crucial for a successful decomposed granite walkway installation. This section Articulates the steps involved in planning your project, presents three sample walkway designs with varying complexity, and compares different decomposed granite sizes.
Walkway Project Planning Steps
Source: wildbloomlandscapes.com
Planning a decomposed granite walkway involves several key steps:
- Determine Walkway Purpose and Location: Define the walkway’s function (e.g., access path, garden stroll) and identify its location on your property.
- Measure and Sketch the Area: Accurately measure the dimensions of the planned walkway and create a detailed sketch, noting any existing features like trees or flowerbeds.
- Choose a Walkway Design: Select a design that complements your landscape and meets your needs (see examples below).
- Calculate Material Quantities: Based on the design and dimensions, determine the amount of decomposed granite, base material, edging, and weed barrier needed.
- Obtain Necessary Permits: Check with your local authorities to see if any permits are required for the walkway installation.
- Set a Realistic Budget: Estimate the total cost, including materials, labor, and permits (see the budgeting section for details).
- Create a Project Timeline: Establish a schedule for completing each stage of the project.
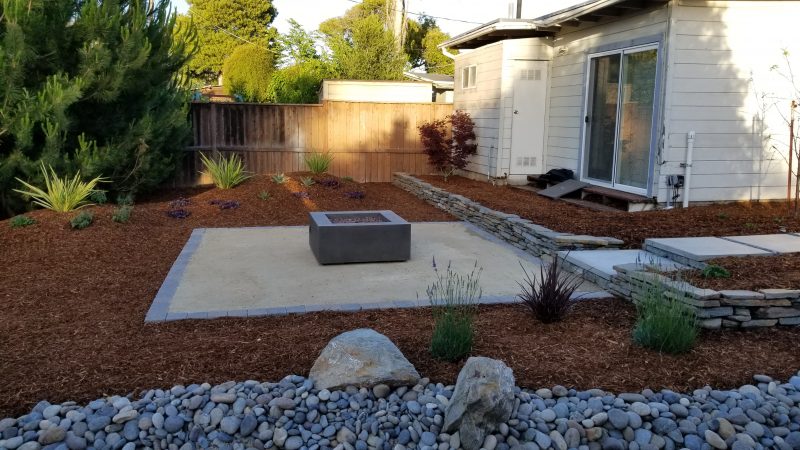
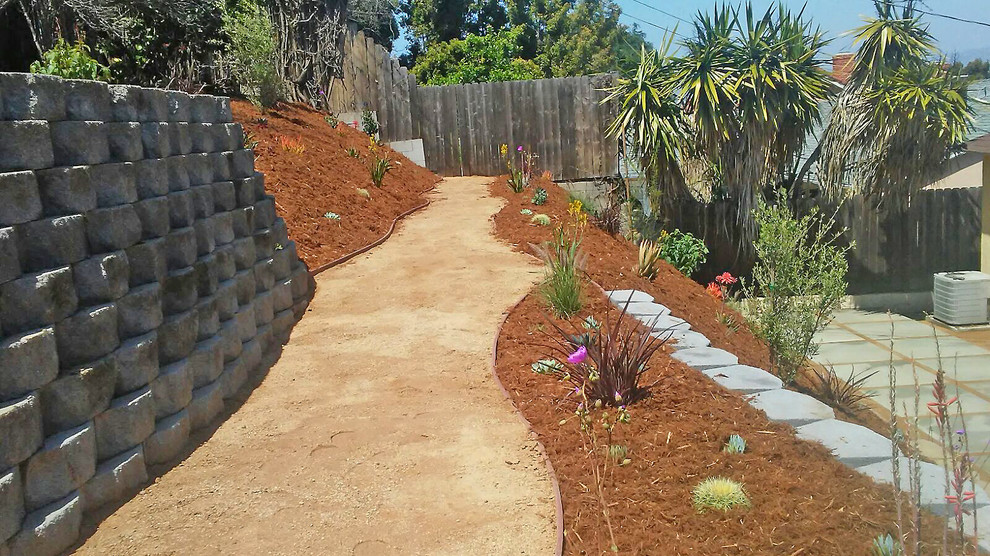
Three Walkway Designs
Here are three example decomposed granite walkway designs, each with varying levels of complexity:
- Simple Straight Path (10ft x 3ft): A straightforward 30 sq ft path. Requires approximately 30 sq ft of decomposed granite, 30 linear feet of edging, and a weed barrier of 30 sq ft. Base material needs will depend on soil compaction.
- Curved Path with Planting Area (20ft x 4ft average width): A more elaborate design incorporating curves and a small planting area on one side. Requires approximately 80 sq ft of decomposed granite, 40 linear feet of edging, and an 80 sq ft weed barrier. Base material quantity will increase based on the curvature and planting area excavation.
- Complex Patterned Walkway (30ft x 5ft average width, incorporating a circular feature): A challenging design with multiple curves and a circular feature. Requires approximately 150 sq ft of decomposed granite, 60 linear feet of edging, and a 150 sq ft weed barrier. This design necessitates precise planning and more base material to support the intricate pattern and circular feature.
Decomposed Granite Size Comparison
| Decomposed Granite Size | Pros | Cons | Best Use Cases |
|---|---|---|---|
| Fine (⅛” – ¼”) | Smooth surface, good for wheelchairs, easy compaction | More prone to settling, may require more frequent replenishment | High-traffic areas, wheelchair accessibility |
| Medium (¼” – ½”) | Good balance of stability and permeability, less settling | Slightly rougher surface | General walkways, moderate traffic |
| Coarse (½” – 1″) | Excellent drainage, highly stable | Rougher surface, may not be suitable for all applications | Low-traffic areas, steep slopes |
| Mixed Sizes | Good drainage and stability, natural look | May require more careful compaction | Varied landscapes, natural aesthetic |
Material Selection & Acquisition
Selecting and acquiring the right materials is essential for a successful project. This section details material requirements for a sample project and explores cost-effective sourcing strategies.
Materials List (100 sq ft project)
For a 100 sq ft decomposed granite walkway, you’ll need approximately:
- 100 sq ft Decomposed Granite
- 100 sq ft Weed Barrier Fabric
- 100 linear feet Edging (material depends on preference)
- Base Material (e.g., gravel, crushed stone) – quantity depends on soil conditions and desired depth (typically 4-6 inches)
- Tools: Shovel, rake, tamper, measuring tape, wheelbarrow
Cost-Effective Sourcing
- Local Suppliers: Often offer competitive pricing and reduce transportation costs. Compare prices from at least three local suppliers.
- Landscaping Supply Yards: Can offer bulk discounts on larger orders.
- Online Retailers: Offer a wide selection, but shipping costs can be significant.
- Recycled Materials: Consider using recycled decomposed granite or other sustainable alternatives to reduce environmental impact and potentially lower costs.
Color and Texture Considerations
The color and texture of decomposed granite should complement the surrounding landscape. Consider the existing colors of your house, garden, and other hardscaping elements. A natural-looking, varied texture often blends well with most environments.
Site Preparation & Excavation
Proper site preparation is crucial for a stable and long-lasting walkway. This section details the excavation process, grading, and base material compaction.
Site Preparation Steps
- Clear the Area: Remove any vegetation, debris, and existing paving materials from the walkway area.
- Mark the Walkway Boundaries: Use string or stakes to mark the Artikel of your walkway according to your design.
- Grading and Leveling: Use a level and shovel to ensure the ground is level and slopes slightly away from structures to prevent water accumulation.
Excavation Process
Excavate the area to a depth of 4-6 inches, depending on the soil conditions and desired base material thickness. The width should be slightly wider than the planned walkway to accommodate the edging and base material.
Base Material Compaction
After excavation, add and compact the base material (e.g., gravel, crushed stone) in layers. Each layer should be compacted using a hand tamper or plate compactor to create a firm, stable base. This prevents settling and ensures a long-lasting walkway.
Installation Process & Techniques
This section provides a step-by-step guide for installing the decomposed granite walkway, including edging and compaction techniques.
Step-by-Step Installation
- Install Edging: Place edging materials along the perimeter of the excavated area to contain the decomposed granite.
- Lay Weed Barrier: Spread a weed barrier fabric over the compacted base to prevent weed growth.
- Add Decomposed Granite: Pour the decomposed granite into the edged area, ensuring even distribution.
- Compact the Decomposed Granite: Use a hand tamper or plate compactor to compact the decomposed granite to achieve the desired density.
- Level the Surface: Use a rake to level the surface of the walkway.
Compaction Methods
Source: hzcdn.com
Hand tampers are suitable for smaller projects, while plate compactors are more efficient for larger areas. Multiple passes are usually necessary to achieve proper compaction.
Walkway Cross-Section
A properly installed decomposed granite walkway has distinct layers: Top Layer (Decomposed Granite, compacted), Base Layer (Compacted Gravel or Crushed Stone, 4-6 inches), and Subgrade (Existing Soil, leveled and compacted).
Finishing Touches & Maintenance
Proper finishing touches and regular maintenance ensure the longevity and beauty of your decomposed granite walkway.
Weed Barrier Application
Laying a weed barrier fabric before adding the decomposed granite prevents weed growth, minimizing maintenance requirements.
Maintenance Techniques
- Weed Control: Regularly remove any weeds that manage to sprout through the weed barrier.
- Replenishment: Periodically add more decomposed granite to areas that have settled or eroded.
- Cleaning: Sweep or blow away leaves and debris to maintain a clean appearance.
Maintenance Schedule
| Task | Frequency |
|---|---|
| Weed removal | Monthly (or as needed) |
| Decomposed granite replenishment | Annually (or as needed) |
| Cleaning | As needed |
Cost Estimation & Budgeting

Source: ytimg.com
Accurate cost estimation is vital for effective project planning. This section provides a sample budget and cost-saving strategies.
Sample Budget (100 sq ft Walkway)
| Expense Category | Estimated Cost |
|---|---|
| Decomposed Granite | $XXX |
| Base Material | $XXX |
| Edging | $XXX |
| Weed Barrier | $XXX |
| Labor (if hiring) | $XXX |
| Tools (if purchasing) | $XXX |
| Total Estimated Cost | $XXX |
Note: Costs are estimates and will vary depending on location and material choices.
Cost-Saving Measures
- DIY Installation: Save on labor costs by installing the walkway yourself.
- Bulk Purchasing: Purchase materials in bulk to get discounted pricing.
- Source Materials Locally: Reduce transportation costs by sourcing materials from local suppliers.
Cost Comparison with Alternatives, Decomposed granite walkway installation
Decomposed granite walkways are generally more cost-effective than concrete or brick pavers, especially for larger projects. However, the cost will depend on the size of the project and material choices.
Safety Considerations & Best Practices: Decomposed Granite Walkway Installation
Safety and best practices ensure a successful and safe installation while maximizing the walkway’s lifespan and minimizing environmental impact.
Safety Precautions
- Wear appropriate safety gear: Gloves, safety glasses, and sturdy footwear are essential.
- Use caution with tools: Operate tools carefully and follow manufacturer instructions.
- Be mindful of uneven surfaces: Take care to avoid tripping hazards during excavation and installation.
Best Practices for Longevity
- Proper compaction: Ensure thorough compaction of the base and decomposed granite layers.
- Regular maintenance: Regularly remove weeds and replenish material as needed.
- Appropriate drainage: Ensure proper drainage to prevent water accumulation.
Environmental Impact
Decomposed granite is a relatively environmentally friendly paving material compared to concrete or asphalt, as it’s often a recycled product and requires less energy to produce. Its permeability also helps with water infiltration and reduces runoff.
FAQ Section
What is the lifespan of a decomposed granite walkway?
With proper installation and regular maintenance, a decomposed granite walkway can last for many years, often a decade or more.
How do I prevent erosion on my decomposed granite walkway?
Proper compaction during installation and the use of a geotextile fabric weed barrier are crucial in preventing erosion. Regular replenishment of material can also help.
Can I install a decomposed granite walkway myself?
Yes, many homeowners successfully install decomposed granite walkways themselves. However, larger or more complex projects might benefit from professional assistance.
What tools are needed for installation?
Essential tools include shovels, rakes, tampers, a wheelbarrow, measuring tape, and possibly edging tools.
How much does decomposed granite cost per square foot?
The cost varies based on location, supplier, and the type of decomposed granite. It’s best to obtain quotes from local suppliers.
Comments are closed.