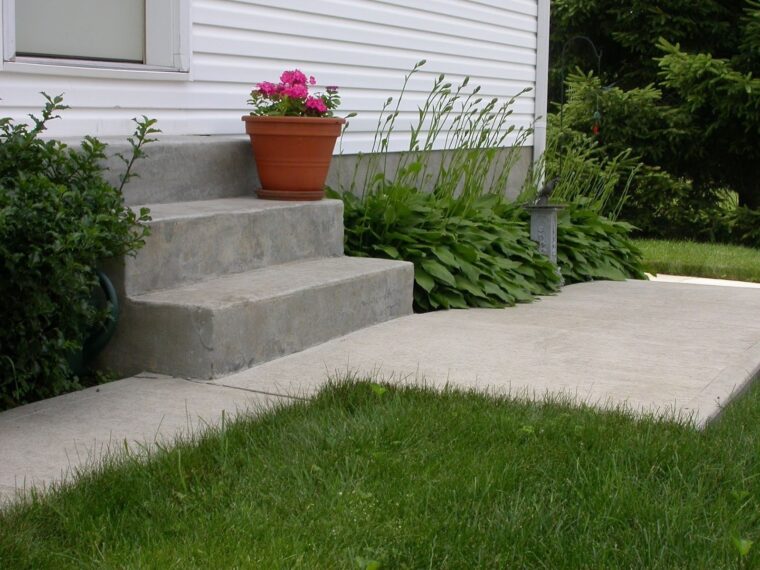
Concrete Walkway Installation
Concrete walkway installation transforms outdoor spaces, adding both functionality and aesthetic appeal. From initial planning and design to the final finishing touches, creating a durable and attractive walkway involves careful consideration of several key steps. This guide provides a comprehensive overview of the entire process, equipping you with the knowledge and understanding necessary to complete your project, whether you’re a seasoned professional or a DIY enthusiast.
This guide covers every aspect, from meticulously planning your walkway’s dimensions and material selection to mastering the intricacies of concrete mixing, pouring, and finishing techniques. We’ll delve into the importance of proper formwork construction, reinforcement strategies, and effective curing methods to ensure a long-lasting, high-quality result. We’ll also explore the essential tools and equipment needed, along with safety precautions to prioritize throughout the project.
Planning & Design for Concrete Walkway Installation
Careful planning and design are crucial for a successful concrete walkway installation. This section covers essential aspects of planning, including design considerations, material estimations, permit acquisition, and site preparation.
Concrete Walkway Design
A 300 sq ft concrete walkway can incorporate various pavement designs. For instance, a 10ft x 30ft rectangular walkway provides ample space. Alternatively, a more complex design might include curves and varying widths to enhance aesthetic appeal. Material specifications would typically include a 4-inch thick concrete slab with a minimum compressive strength of 3000 psi. Reinforcement would be necessary depending on the walkway’s length, load-bearing requirements, and design complexity.
Materials List for a 100 sq ft Walkway

Source: diycraftsy.com
This list provides a general estimate; actual quantities may vary based on design and site conditions.
- Concrete: Approximately 3 cubic yards (assuming a 4-inch thick slab).
- Rebar: #4 rebar at 12-inch spacing both ways (quantity depends on the layout and dimensions).
- Formwork: Pressure-treated lumber (quantity depends on the walkway’s perimeter and thickness).
- Gravel Base: Approximately 2 cubic yards (for proper drainage and compaction).
- Other Materials: Wire ties, stakes, concrete sealer, joint sealant.
Obtaining Necessary Permits
Securing the necessary permits is a vital initial step. Contact your local building department to determine specific requirements, which may vary depending on location and project scope. Typically, this involves submitting plans, and specifications, and potentially paying associated fees.
Site Preparation

Source: pinimg.com
Thorough site preparation is essential for a stable and long-lasting walkway. This involves several key steps illustrated below.
- Clearing and Grading: Remove any vegetation, debris, and topsoil from the walkway area. Proper grading ensures proper drainage, achieving a consistent slope away from structures to prevent water accumulation. Illustrations would show a sloped surface with a consistent gradient.
- Compaction: Compact the subgrade using a plate compactor to create a stable base. Illustrations would demonstrate the use of a plate compactor and the resulting firm subgrade. Proper compaction prevents settling and ensures even distribution of load.
- Gravel Base Installation: Spread and compact a layer of gravel (typically 4-6 inches) to provide additional drainage and stability. Illustrations would show the gravel layer uniformly distributed and compacted.
Formwork Construction and Reinforcement
Source: cloudfront.net
Proper formwork construction and reinforcement are critical for creating a durable and structurally sound walkway. This section details formwork construction for curved sections, rebar placement, formwork material comparison, and leveling techniques.
Formwork for Curved Walkway Sections
Constructing formwork for curved sections requires careful planning and execution. Plywood or metal forms can be bent using flexible supports or cut into segments to follow the curve’s radius. Precise measurements and secure fastening are essential to prevent leakage and maintain the desired shape. Accurate formwork is crucial to avoid concrete imperfections and ensure the finished walkway conforms to the intended design.
Rebar Placement and Spacing
Reinforcement is crucial for strengthening the concrete and preventing cracking. Proper placement and spacing of rebar depend on the walkway’s dimensions and anticipated loads.
| Rebar Size | Spacing (inches) | Depth (inches) |
|---|---|---|
| #4 | 12 | 2 |
| #4 | 12 | 2 |
Note: This table provides example values; actual requirements vary based on project specifics. Straight sections typically use a grid pattern, while curved sections may require adjustments for proper coverage.
Formwork Material Comparison
- Wood: Cost-effective, readily available, but less durable and prone to warping.
- Metal: Durable, and reusable, but more expensive and may require specialized tools for assembly.
- Plastic: Lightweight, easy to handle, but may not be suitable for all applications.
Ensuring Level and Plumb Formwork
Before pouring concrete, meticulously check the formwork’s level and plumb using a level and plumb bob. Adjustments can be made using shims or other leveling devices. Precise leveling ensures a smooth, even surface for the finished walkway. Improper leveling can lead to uneven concrete surfaces, affecting both aesthetics and functionality.
Concrete Mixing and Pouring: Concrete Walkway Installation
This section details the on-site concrete mixing process, pouring techniques for sloped walkways, concrete consolidation, and a workflow diagram for the pouring and finishing phases.
On-Site Concrete Mixing
Achieving the desired concrete strength and workability relies heavily on the correct water-cement ratio and proper mixing techniques. Generally, a water-cement ratio of 0.45 to 0.55 is recommended. Mixing should be thorough to ensure uniform distribution of ingredients. Over-mixing can reduce strength, while under-mixing leads to inconsistent quality.
Concrete Pouring for Sloped Walkways
Pouring concrete on a sloped walkway requires careful control to prevent segregation (separation of aggregates and cement paste). Start pouring at the lowest point and work upwards, ensuring even distribution. Use a screed to level the concrete, maintaining the desired slope. Consistent pouring and leveling are vital to avoid unevenness and potential cracking.
Concrete Consolidation
Concrete consolidation, typically achieved through vibration, removes trapped air bubbles and ensures a dense, strong final product. Using a concrete vibrator helps eliminate voids and improve the concrete’s overall strength and durability. Insufficient consolidation leads to weaknesses and potential long-term problems.
Concrete Pouring and Finishing Workflow
A visual workflow diagram would show a sequence of actions, including Formwork inspection, concrete delivery, pouring, leveling (screeding), consolidation (vibration), finishing (e.g., broom finish), and initial curing.
Finishing and Curing
Proper finishing and curing are critical for achieving the desired surface texture and ensuring the long-term durability of the concrete walkway. This section covers finishing techniques, curing methods, control joint creation, and protection during curing.
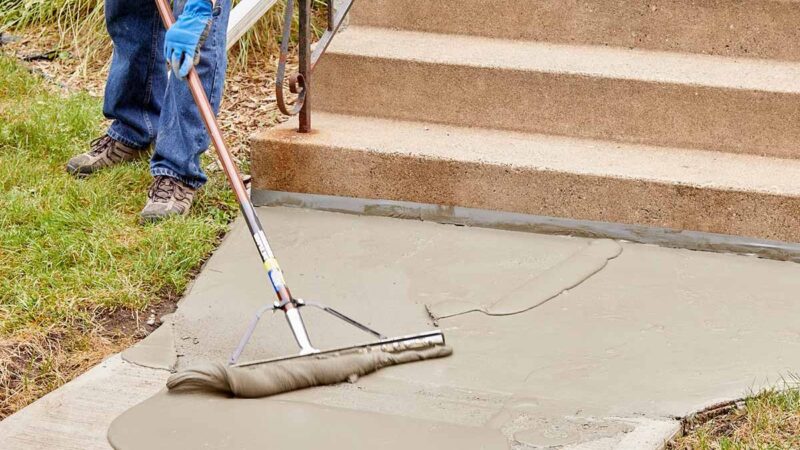
Concrete Finishing Techniques
Various finishing techniques can create different textures. The choice depends on aesthetic preferences and intended use.
| Texture | Tools Required | Maintenance Considerations |
|---|---|---|
| Broom Finish | Broom, Magnesium Float | Regular sweeping to remove debris |
| Stamped Concrete | Stamping mats, release agent | Sealing to protect the design |
| Exposed Aggregate | Acid wash, brushes | Regular cleaning to prevent staining |
Concrete Curing Methods
Curing is essential for hydration and strength development. Methods include water curing (keeping the surface consistently moist), membrane curing (applying a curing compound), and using wet burlap. These methods ensure proper hydration, preventing premature drying and cracking. Adequate curing is vital for long-term durability.
Creating Control Joints
Control joints are strategically placed to create planned cracks, preventing uncontrolled cracking due to shrinkage or thermal expansion. These joints are typically created using a concrete saw, with spacing depending on the walkway’s dimensions and anticipated stress. Illustrations would show the placement of control joints, usually at regular intervals and corners.
Protecting Newly Poured Concrete
Protect the newly poured concrete from rapid drying, extreme temperatures, and foot traffic during the curing period. This may involve covering the surface with plastic sheeting, burlap, or using a curing compound. Protection minimizes damage and ensures proper strength development.
Tools and Equipment
The success of a concrete walkway project relies on having the right tools and equipment. This section Artikels essential tools, compares concrete saws, describes concrete vibrator operation, and details the functions of a power trowel.
Essential Tools and Equipment, Concrete walkway installation
The tools and equipment can be categorized for better organization.
- Mixing: Concrete mixer (either portable or stationary), wheelbarrow, shovels.
- Forming: Measuring tapes, levels, saws, hammers, nails, stakes, and string lines.
- Finishing: Floats, bull floats, edgers, groovers, brooms, concrete stamps (if applicable).
- Curing: Plastic sheeting, burlap, curing compound, spray bottles.
- Other: Safety glasses, gloves, work boots.
Concrete Saws
Various concrete saws exist, each with different blade types for various applications. Choosing the right blade (e.g., a diamond blade for clean cuts) and adhering to safety precautions (eye protection, hearing protection) are crucial.
Concrete Vibrator Operation

Source: pinimg.com
Concrete vibrators help remove air pockets, ensuring a dense and strong concrete slab. Proper operation involves inserting the vibrator into the concrete and moving it slowly and methodically to avoid creating voids or damaging the formwork. Safety precautions, such as using gloves and avoiding contact with moving parts, are essential.
Power Trowel Function
A power trowel is used to create a smooth and level surface. It rotates blades to level and finishes the concrete, creating a polished or textured finish depending on the technique used. Proper operation and safety precautions are vital for achieving a high-quality finish.
FAQ
What is the average lifespan of a concrete walkway?
With proper installation and maintenance, a concrete walkway can last for 20-30 years or even longer.
How much does concrete walkway installation typically cost?
The cost varies greatly depending on size, design complexity, materials used, and labor costs. Getting multiple quotes from contractors is recommended.
Can I install a concrete walkway myself?
While possible for smaller, simpler projects, larger or more complex installations are best left to experienced professionals. Proper techniques are crucial for durability.
What type of concrete is best for a walkway?
A high-strength concrete mix designed for exterior applications is recommended. Consult with a concrete supplier for specific recommendations based on your location and project requirements.
How long does it take for concrete to cure completely?
Complete curing takes several weeks, though light foot traffic may be possible after a few days, depending on weather conditions and the type of concrete used.
Comments are closed.