Brick Walkway Installation
Brick walkway installation transforms outdoor spaces, adding both beauty and functionality. This guide delves into every aspect of creating a stunning and durable brick walkway, from initial planning and design to the final finishing touches and long-term maintenance. We’ll cover selecting the right materials, mastering the installation process, and budgeting effectively to ensure your project is a success.
Whether you’re a seasoned DIY enthusiast or a novice embarking on your first landscaping project, this comprehensive resource provides step-by-step instructions, helpful tips, and valuable insights to guide you through each stage. We aim to empower you with the knowledge and confidence to create a beautiful brick walkway that enhances your property for years to come.
Brick Walkway Installation: A Comprehensive Guide

Source: familyhandyman.com
Creating a beautiful and durable brick walkway adds significant curb appeal and value to your property. This guide provides a step-by-step approach to planning, designing, and installing your brick walkway, covering everything from initial design to finishing touches and maintenance.
Walkway Design and Planning
Effective planning is crucial for a successful brick walkway project. This includes designing the layout, selecting appropriate materials, and considering crucial factors like drainage.
For a 10x20ft area, a design incorporating both straight sections and gentle curves can create a visually appealing walkway. Consider using a combination of straight paths connecting different areas of your garden or yard, with curves added to soften the overall look and create a more natural flow. A simple example could be a straight 10ft section leading to a gently curved 10ft section, then another straight 10ft section.
Materials List (example for a 10x20ft walkway):
- Paving Bricks: Approximately 200-250 bricks (depending on brick size and layout)
- Base Material (Crushed Stone/Gravel): Approximately 1 cubic yard
- Sand: Approximately 0.5 cubic yard
- Mortar (if using): Appropriate quantity based on brick type and layout
- Edging Materials (e.g., concrete, metal, or plastic edging): Sufficient length to border the walkway
- Brick Sealer
Different brick types offer varying characteristics. The table below highlights key specifications:
| Brick Type | Size (inches) | Color Options | Durability |
|---|---|---|---|
| Paving Brick (Clay) | 4×8, 6×12 (vary) | Red, Brown, Gray, Multi-colored | High; resistant to freeze-thaw cycles |
| Concrete Paver | 4×8, 6×12 (vary) | Wide range, including natural stone look | High; durable and low maintenance |
| Reclaimed Brick | Varies significantly | Varied, often with character and imperfections | Moderate to High; depending on the condition of the reclaimed brick |
| Engineering Brick | Varies | Typically red or brown | Very High; extremely durable and strong |
Proper drainage is essential to prevent water damage and ensure the longevity of your walkway. The base should be prepared with a compacted layer of crushed stone or gravel, sloped slightly away from buildings to direct water runoff. A minimum slope of 1/4 inch per foot is generally recommended.
Materials and Tools

Source: pinimg.com
Gathering the right tools and materials ensures a smooth and efficient installation process. The selection of sand and mortar is particularly important for the structural integrity and longevity of the walkway.
Tools Required: Shovel, wheelbarrow, tamper/compactor, measuring tape, string line, level, brick saw or grinder, rubber mallet, trowel, jointing tool, safety glasses, and work gloves.
Sand Comparison:
- Sharp Sand: Excellent for creating a firm, stable base. Provides good drainage.
- Washed Sand: Cleaner than sharp sand, but may not offer the same level of compaction.
- Building Sand: Generally a good all-around option, but ensure it is well-compacted.
Mortar selection depends on factors like climate and brick type. For freeze-thaw climates, a frost-resistant mortar is crucial. Consult with a building supply professional to choose the appropriate mortar for your specific needs and brick type. Consider factors like compressive strength and water absorption.
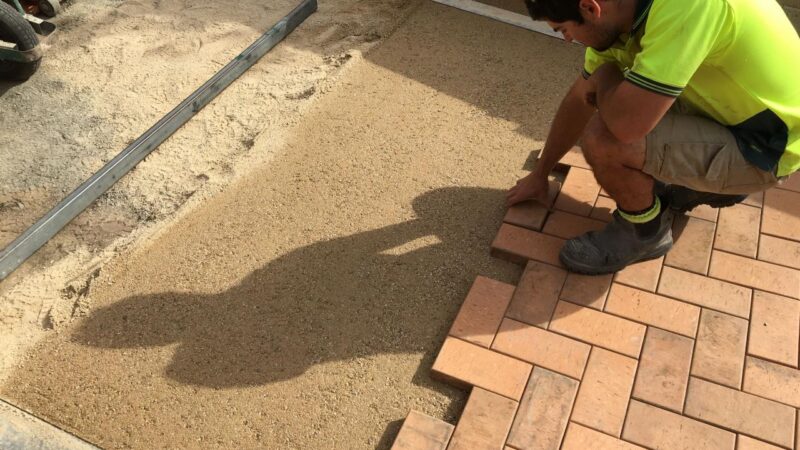
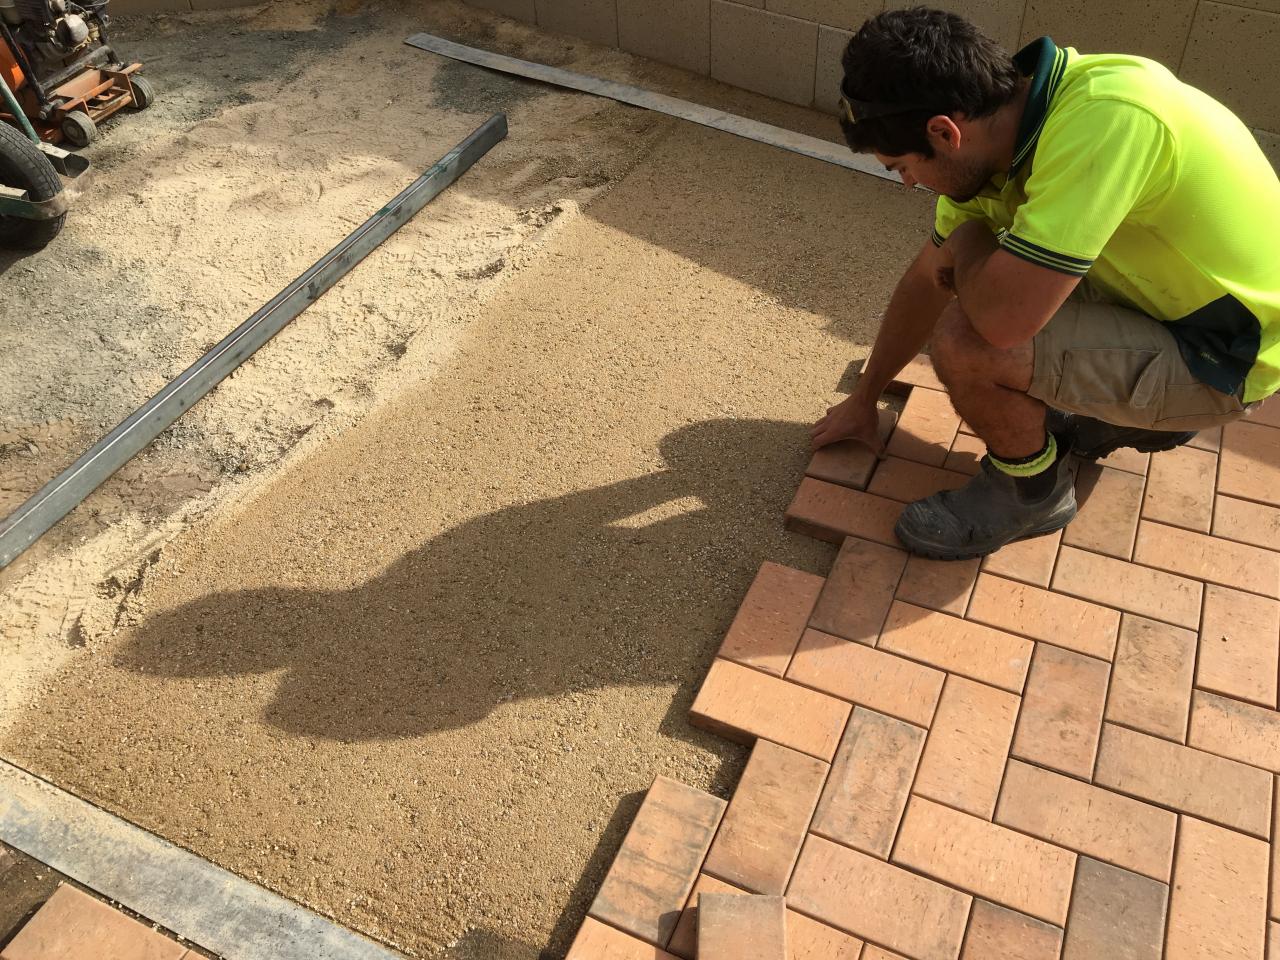
Brick Walkway Installation Process

Source: astromasonry.com
The installation process involves careful ground preparation, precise bricklaying, and attention to detail throughout.
Ground Preparation: Excavate the area to a depth of approximately 6-8 inches. Compact the base thoroughly using a tamper or compactor. Add a layer of crushed stone or gravel (approximately 4 inches), compact again, and then add a layer of sand (approximately 2 inches), leveling it carefully using a screed or straight edge. Create a slight slope away from any structures.
Laying Bricks in a Running Bond Pattern: The running bond pattern involves laying bricks end-to-end in alternating rows, creating a staggered effect. Begin by laying out a string line to guide the first row. Apply a thin layer of mortar (if using) to the sand bed and carefully place the bricks, ensuring they are level and aligned. Use a rubber mallet to gently tap the bricks into place. Maintain consistent spacing between bricks.
A visual representation of a running bond:
A B A B A B
B A B A B A
Cutting Bricks: For curves and obstacles, use a brick saw or grinder to carefully cut bricks to the required size and shape. Dry-fit the cut bricks before applying mortar to ensure a precise fit.
Finishing Touches and Maintenance

Source: pinimg.com
Finishing touches and regular maintenance significantly enhance the appearance and lifespan of your brick walkway.
Creating Neat Edges: Use concrete, metal, or plastic edging to create a clean and defined border. Install the edging before laying the bricks, embedding it in the base material. Alternatively, a border of larger bricks or pavers can be created.
Sealing the Walkway:
- Clean the walkway thoroughly using a stiff brush and water to remove any loose debris or mortar.
- Allow the walkway to dry completely before applying the sealer.
- Apply the sealer according to the manufacturer’s instructions, using a brush or roller.
- Allow sufficient drying time before using the walkway.
Preventative Maintenance: Regularly sweep the walkway to remove debris. Address any weeds or plant growth promptly. Reseal the walkway every few years, depending on the climate and sealer used. Repair any damaged bricks or mortar as needed.
Cost Estimation and Budgeting

Source: pinimg.com
A realistic budget is essential for successful project management. The costs below are estimates and may vary based on the location and materials chosen.
| Material | Quantity | Cost |
|---|---|---|
| Paving Bricks | 250 | $500 |
| Base Material (Gravel) | 1 cubic yard | $100 |
| Sand | 0.5 cubic yard | $50 |
| Mortar (if used) | 1 bag | $25 |
| Edging | 20 ft | $100 |
| Sealer | 1 gallon | $50 |
| Labor (estimated) | $500 | |
| Permits (if required) | $50 | |
| Total Estimated Cost | $1425 |
Factors influencing cost include material prices, labor costs (hiring professionals vs. DIY), permit fees (if required), and the complexity of the design. For example, intricate curves or extensive cutting will increase labor costs.
Cost-Saving Measures: Consider purchasing materials in bulk, opting for less expensive brick types, and undertaking the installation yourself (if you have the skills and time).
Safety Precautions
Source: pinimg.com
Safety should be a top priority throughout the installation process. Proper precautions minimize risks and ensure a safe working environment.
Personal Protective Equipment (PPE): Wear safety glasses to protect your eyes from debris. Use work gloves to protect your hands. Consider wearing a dust mask when working with sand or mortar. Steel-toed boots are recommended to protect your feet from dropped objects.
Waste Disposal: Dispose of construction waste responsibly, following local regulations. Separate materials like bricks, wood, and metal for appropriate recycling or disposal.
Emergency Procedures: Have a first-aid kit readily available. Know the location of the nearest hospital or emergency services. If an accident occurs, seek immediate medical attention and report the incident to relevant authorities if necessary.
Detailed FAQs
What is the average lifespan of a brick walkway?
With proper installation and maintenance, a brick walkway can last for several decades, even exceeding 50 years in many cases.
Can I install a brick walkway myself, or should I hire a professional?
While DIY installation is possible, particularly for smaller projects, hiring a professional is recommended for larger or more complex designs to ensure proper installation and longevity.
How often should I seal my brick walkway?
Sealing is typically recommended every 2-3 years, depending on climate and exposure to the elements. Regular inspection will help determine when resealing is necessary.
What type of brick is best for high-traffic areas?
For high-traffic areas, choose durable bricks with high compressive strength, such as those made of clay or concrete with a high-density rating.
What are the common causes of brick walkway damage?
Common causes include improper installation, inadequate drainage, freeze-thaw cycles, and lack of regular maintenance, including sealing.
Comments are closed.