Installing Flagstone Walkway

Installing a flagstone walkway – Installing a flagstone walkway transforms any outdoor space, adding both beauty and functionality. This guide provides a comprehensive walkthrough, from initial planning and ground preparation to laying the stones and applying the finishing touches. We’ll explore various design options, techniques for achieving a level surface, and essential maintenance tips to ensure your walkway remains a stunning feature for years to come. Whether you’re a seasoned DIY enthusiast or a beginner tackling your first landscaping project, this detailed guide will equip you with the knowledge and confidence to create a beautiful and durable flagstone walkway.
We’ll cover everything from selecting the right flagstones and designing your layout to properly compacting the base and choosing the perfect jointing compound. Learn how to cut flagstones to fit, create aesthetically pleasing patterns, and protect your investment with proper sealing techniques. We aim to make this process straightforward and enjoyable, helping you achieve a professional-looking result.
Planning Your Flagstone Walkway

Source: pinimg.com
Careful planning is crucial for a successful flagstone walkway installation. This involves designing the layout, determining material quantities, and selecting an appropriate pattern. Consider factors such as the available space, the garden’s slope, and your desired aesthetic to create a walkway that complements your landscape.
Walkway Design and Material Estimation
For a small garden walkway, let’s consider a 10ft x 3ft design. The following table Artikels dimensions and material estimates. These are approximate and may vary based on flagstone size and chosen pattern.
| Item | Quantity | Dimensions |
|---|---|---|
| Flagstones | Approximately 30-40 (depending on size) | Variable (e.g., 12″x12″, 18″x18″) |
| Base Gravel (4″ deep) | Approximately 1 cubic yard | 10ft x 3ft x 4″ |
| Sand (1″ deep) | Approximately 0.25 cubic yard | 10ft x 3ft x 1″ |
| Edging | 13ft (perimeter) | 3ft + 10ft + 3ft + 10ft – allowance for corners |
Materials List for a 10ft x 3ft Walkway

Source: ytimg.com
This list provides a comprehensive overview of the necessary materials and tools for your project. Remember to adjust quantities based on your specific needs and flagstone dimensions.
- Flagstones: 30-40 pieces (various sizes and shapes)
- Base Gravel: 1 cubic yard
- Sand: 0.25 cubic yard
- Edging: 13 linear feet (consider plastic or metal edging)
- Weed Barrier Fabric: Sufficient to cover the 30 sq ft area
- Tools: Shovel, rake, tamper, level, measuring tape, string line, safety glasses, gloves, and potentially a masonry saw or angle grinder (for cutting flagstones).
Flagstone Patterns
Source: pinimg.com
Different flagstone patterns create diverse aesthetic effects. The choice depends on your personal preference and the overall garden design.
- Running Bond: Flagstones are laid in parallel rows, creating a simple, clean look. Suitable for formal gardens or walkways with a linear design.
- Herringbone: Flagstones are arranged in a zig-zag pattern, offering a more intricate and visually interesting design. Works well in spaces where a dynamic pattern is desired.
- Random Pattern: Flagstones of varying sizes and shapes are placed to create a natural, less structured appearance. Ideal for informal gardens and landscapes aiming for a rustic feel.
Preparing the Ground
Proper ground preparation is essential for a stable and long-lasting flagstone walkway. This involves excavating to the correct depth, compacting the base, and installing a weed barrier.
Excavation and Base Preparation
Excavate the area to a depth of approximately 6 inches (4 inches for gravel and 1-2 inches for sand). The width should be slightly wider than your planned walkway to accommodate the edging and base materials. Soil type influences excavation depth; clay soil may require deeper excavation for proper drainage.
Compaction of Base Materials
Proper compaction is crucial to prevent settling and ensure a level walkway surface. Use a hand tamper or plate compactor to achieve optimal compaction. Multiple passes are recommended for each layer of gravel and sand.
Weed Barrier Installation
Installing a weed barrier prevents unwanted plant growth from disrupting your walkway. Follow these steps:
- Lay the weed barrier fabric over the compacted gravel base, ensuring it extends beyond the walkway edges.
- Overlap the fabric edges by at least 6 inches to prevent weed penetration.
- Secure the fabric with landscaping pins or staples.
- Spread a 1-inch layer of sand evenly over the weed barrier.
Laying the Flagstones
Laying flagstones requires precision and attention to detail to achieve a level and stable surface. Use a level and tamper to ensure proper placement and compaction.
Flagstone Placement and Leveling
Begin laying flagstones, starting at a corner or a prominent point. Use a level to ensure each stone is level with its neighbors. Tap stones into place using a rubber mallet or tamper. Maintain consistent joint widths (around ½ inch is common) for a professional look.
Cutting Flagstones, Installing flagstone walkway
Cutting flagstones may be necessary to fit them into specific spaces. Several methods exist, each with its advantages and disadvantages.
| Method | Advantages | Disadvantages |
|---|---|---|
| Masonry Saw | Precise cuts, suitable for various stone types | Requires power source, can be noisy |
| Angle Grinder with Diamond Blade | Fast cutting, good for rough cuts | Can be messy, and requires safety precautions |
| Handheld Chisel and Hammer | No power source is needed, good for small adjustments | Labor-intensive, less precise cuts |
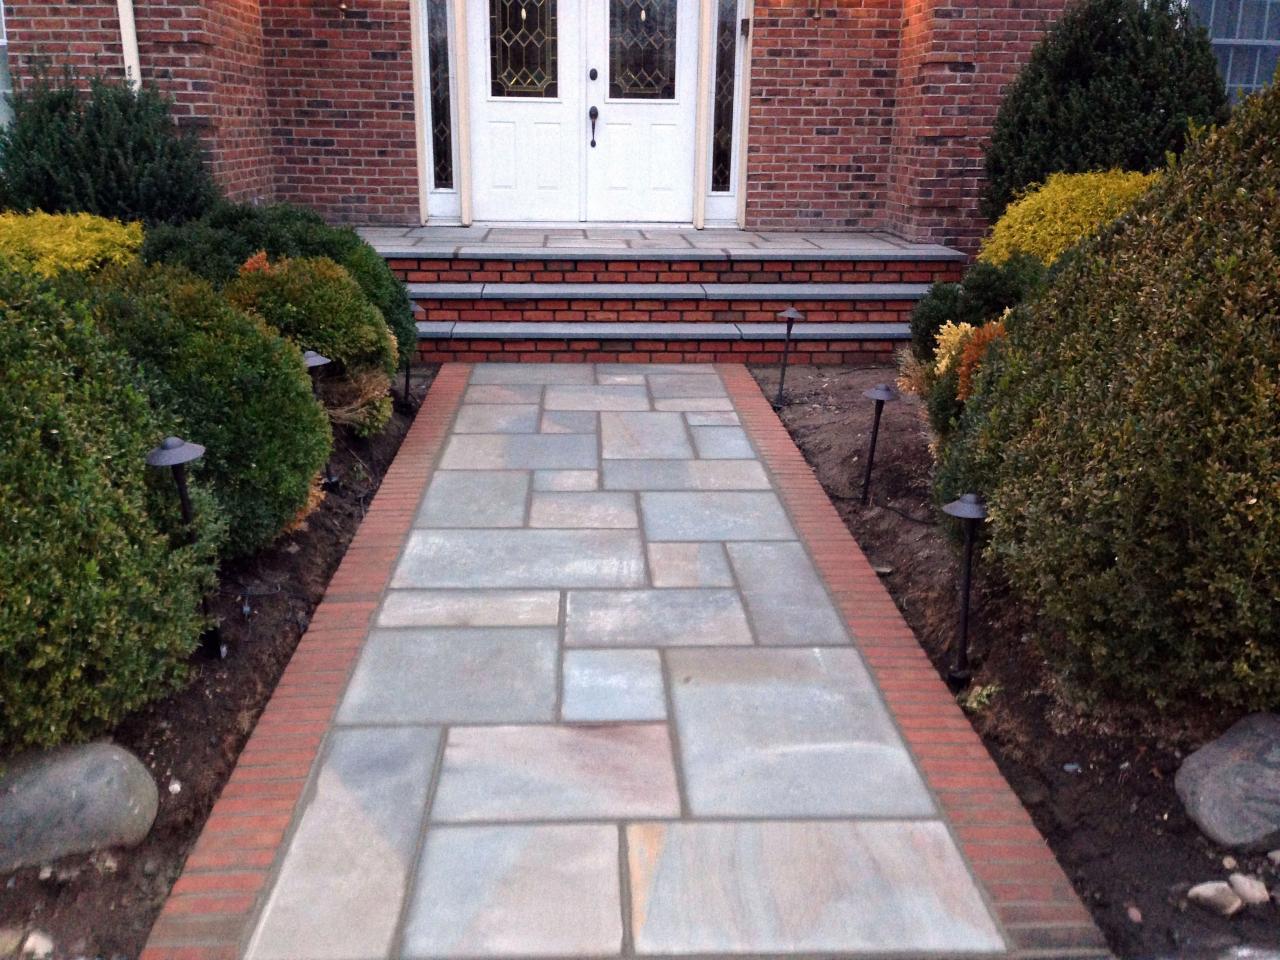
Achieving a Natural Look
A visual representation of a natural-looking flagstone walkway might involve a mix of sizes and shapes, creating a varied texture. Larger stones could anchor the walkway’s edges, while smaller stones fill gaps and curves. Slight variations in stone placement, with some stones overlapping slightly, can enhance the natural aesthetic.
Finishing Touches: Installing Flagstone Walkway
Finishing touches enhance the walkway’s appearance and longevity. This includes installing edging, filling gaps, and sealing the surface.
Edging Installation

Source: storables.com
Install edging along the perimeter of the walkway to create a clean and defined edge. Use metal or plastic edging, embedding it firmly into the surrounding soil. Ensure the edging is level with the flagstones for a professional finish.
Joint Filling

Source: thespruce.com
Filling gaps between flagstones prevents weed growth and stabilizes the walkway. Several jointing compounds exist, including polymeric sand and mortar. Polymeric sand is generally easier to use and offers good weed control. Mortar provides greater strength and durability.
Sealing the Walkway

Source: kempkerstruevalue.com
Sealing protects the flagstones from weathering and staining. Follow these steps:
- Clean the walkway thoroughly to remove dust, dirt, and debris.
- Apply a suitable sealant according to the manufacturer’s instructions. Use a brush or roller for even coverage.
- Allow sufficient drying time before using the walkway.
Troubleshooting and Maintenance
Addressing potential problems and performing regular maintenance ensures the longevity of your flagstone walkway.
Common Problems and Solutions
Common issues include settling, weed growth (despite the weed barrier), and cracked stones. Settling can be addressed by lifting and re-compacting the base. Persistent weed growth might require spot treatment with herbicide. Cracked stones may need replacement.
Preventative Maintenance
Regular sweeping or brushing removes debris and prevents build-up. Resealing every few years protects against weathering and staining.
Repairing Minor Damage
Repairing minor damage, such as cracked stones or loose joints, extends the walkway’s lifespan. Follow these steps:
- Remove the damaged stone or section.
- Prepare the area by cleaning and compacting the base.
- Replace the stone or fill the gap with suitable material (mortar or polymeric sand).
- Allow sufficient drying time before use.
Questions and Answers
What type of flagstone is best for a walkway?
The best type of flagstone depends on your climate and budget. Bluestone is durable and weather-resistant, while limestone offers a softer, more rustic look. Consider local availability and your aesthetic preferences.
How much does it cost to install a flagstone walkway?
The cost varies greatly depending on the size of the walkway, the type of flagstone used, and labor costs. It’s best to obtain quotes from several contractors to get an accurate estimate.
How long does it take to install a flagstone walkway?
The installation time depends on the size and complexity of the project. A small walkway might take a weekend, while a larger project could take several days or even weeks.
Can I install a flagstone walkway myself?
Yes, with proper planning and the right tools, many DIY enthusiasts successfully install flagstone walkways. However, for larger or more complex projects, professional installation may be advisable.
How do I clean my flagstone walkway?
Regular sweeping is crucial. For deeper cleaning, use a mild detergent and a soft brush. Avoid harsh chemicals that could damage the stone.
Comments are closed.