Paver Walkway
Paver walkways offer a blend of functionality and aesthetic appeal, transforming ordinary pathways into stunning landscape features. From the initial design concept to the final installation and ongoing maintenance, creating a paver walkway involves careful planning and execution. This guide delves into every aspect of the process, providing you with the knowledge and tools to successfully build your dream walkway.
We’ll explore a variety of paver materials, each with unique properties and aesthetic qualities. We’ll then guide you through the design phase, covering crucial elements like layout, drainage, and calculating material needs. Detailed installation instructions, maintenance tips, and cost considerations are also included to ensure a long-lasting and beautiful result. Finally, we’ll discuss important accessibility and safety features to create a walkway that is both attractive and functional for everyone.
Paver Walkway Materials
Choosing the right paver material is crucial for the longevity, aesthetic appeal, and overall success of your walkway project. Several materials offer distinct advantages and disadvantages, impacting both the initial cost and long-term maintenance. Understanding these differences is key to making an informed decision.
Paver Material Comparison
The following table compares the properties of common paver materials, helping you weigh the pros and cons for your specific needs and landscaping style.
| Material | Durability | Cost | Maintenance | Aesthetic Appeal |
|---|---|---|---|---|
| Brick | High; durable and resistant to cracking, but susceptible to staining. | Moderate to High; varies depending on type and quality. | Moderate; regular cleaning and occasional repairs may be needed. | Versatile; offers a wide range of colors, textures, and patterns. Can create both formal and informal looks. |
| Concrete | Moderate to High; can crack under heavy stress or freeze-thaw cycles. | Low to Moderate; varies widely depending on type and finish. | Low; typically requires minimal maintenance. | Versatile; available in various colors, textures, and shapes. Can mimic the look of other materials. |
| Stone (Natural) | High; very durable and long-lasting, but can be susceptible to weathering. | High; can be significantly more expensive than other materials. | Low to Moderate; minimal maintenance, but occasional cleaning and sealing may be necessary. | High; offers a unique and natural look, adding a touch of elegance. |
| Permeable Pavers | Moderate; durability varies depending on material and construction. | Moderate to High; often more expensive than traditional pavers. | Moderate; requires regular cleaning to prevent clogging. | Versatile; available in various materials and colors, contributing to environmentally friendly landscaping. |
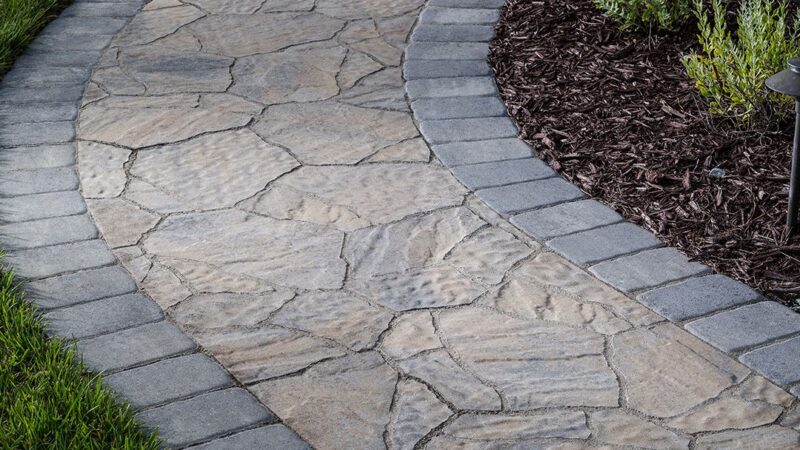
Advantages and Disadvantages of Paver Types

Source: vulcandc.com
Each paver type presents a unique set of advantages and disadvantages that should be considered before making a selection.
- Brick: Advantages include durability, aesthetic versatility, and relatively easy installation. Disadvantages include higher costs compared to concrete and potential staining.
- Concrete: Advantages include affordability and ease of installation. Disadvantages include lower durability compared to brick or stone and potential cracking.
- Stone: Advantages include exceptional durability and natural beauty. Disadvantages include high cost and potential weathering.
- Permeable Pavers: Advantages include environmental benefits (improved water drainage and reduced runoff). Disadvantages include higher costs and the need for regular cleaning to maintain permeability.
Paver Materials and Landscaping Styles, Paver walkway
The choice of paver material can significantly impact the overall aesthetic of your landscape. For example, brick pavers can complement a traditional or formal garden design, while natural stone pavers might be more suitable for a rustic or naturalistic setting. Concrete pavers offer flexibility, adapting to various styles with the use of different colors, shapes, and patterns.
Paver Walkway Design and Planning
Careful planning is essential for a successful paver walkway project. This includes designing the layout, calculating material needs, and ensuring proper drainage.
Walkway Layout Design
Consider the following design elements when planning a 20ft x 10ft paver walkway:
- Straight lines or curves: Straight lines create a formal look, while curves offer a more natural feel. A combination can be visually appealing.
- Width: A walkway should be wide enough for comfortable passage (minimum 3-4 feet).
- Border design: Borders define the walkway and add a finished look. Options include simple straight edges or more elaborate designs using different paver types or sizes.
- Pattern: Various paver patterns (herringbone, running bond, basketweave) can add visual interest. The pattern chosen should complement the overall landscaping style.
- Integration with the surrounding landscape: Consider how the walkway will connect to other landscape features such as patios, gardens, or driveways.
Paver Quantity Calculation
Calculating the required number of pavers involves determining the walkway’s area and accounting for waste and cuts. Measure the walkway’s length and width, calculate the area, and then add 10-15% for waste to account for cuts and breakage.
Drainage and Grading
Source: thespruce.com
Proper drainage is critical to prevent water accumulation and damage to the walkway. The base should be graded to ensure a slight slope away from the house or any structures to facilitate water runoff. Permeable pavers can further enhance drainage.
Paver Walkway Installation
Installing a paver walkway requires careful preparation and attention to detail. Following these steps will ensure a durable and aesthetically pleasing result.
Step-by-Step Installation Guide
- Excavation and Base Preparation: Excavate the area to the desired depth (typically 4-6 inches). Compact the base thoroughly to provide a stable foundation.
- Base Material Installation: Add a layer of compacted gravel (4-6 inches) for drainage. A layer of sand (1-2 inches) is then added for leveling and paver support.
- Paver Placement: Begin laying pavers, ensuring even spacing and alignment. Use a rubber mallet to gently tap pavers into place.
- Joint Filling: Fill the joints between pavers with polymeric sand to prevent weed growth and stabilize the walkway. Sweep the sand into the joints and thoroughly wet it to compact it.
- Compaction: Compact the installed pavers to ensure stability. A plate compactor is recommended for larger areas.
Tools and Equipment

Source: pinimg.com
Necessary tools include shovels, rakes, tampers, levels, rubber mallets, wheelbarrows, and possibly a plate compactor. Safety glasses and work gloves are essential.
Avoiding Common Mistakes
Common mistakes include inadequate base preparation, improper grading, inconsistent paver spacing, and insufficient joint filling. Addressing these issues promptly can prevent costly repairs later.
Paver Walkway Maintenance and Repair
Regular maintenance is key to preserving the beauty and longevity of your paver walkway. Addressing minor issues promptly can prevent major repairs.
Maintenance Tips
- Regular Cleaning: Sweep or blow away debris regularly. Use a pressure washer for deeper cleaning, but avoid using excessive pressure.
- Weed Control: Regularly remove weeds to prevent root damage and maintain a neat appearance.
- Repair Damaged Pavers: Replace cracked or damaged pavers promptly to prevent further deterioration.
- Joint Maintenance: Top up polymeric sand in joints as needed to prevent weed growth.
Repairing Cracks and Settling

Source: Squarespace-cdn.com
Minor cracks can be filled with epoxy or concrete patching compound. Settling may require lifting and re-setting the affected pavers, ensuring proper base compaction.
Regular Inspection
Regular inspections, ideally twice a year (spring and fall), allow for early detection of problems and preventative maintenance.
Paver Walkway Styles and Aesthetics
Paver walkways can be designed in a variety of styles to complement different landscaping aesthetics.
Design Styles
- Formal: Straight lines, geometric patterns, and uniform paver sizes create a structured and elegant look. Think symmetrical designs and clean lines.
- Informal: Curved lines, irregular patterns, and a mix of paver sizes and materials create a more relaxed and natural feel. This style often integrates seamlessly with the surrounding vegetation.
- Traditional: Often incorporates classic materials like brick or stone in traditional patterns like running bond or herringbone. This style evokes a sense of history and timelessness.
- Modern: Features clean lines, minimalist designs, and contemporary materials like concrete or large-format pavers. Often uses bold colors or contrasting textures.
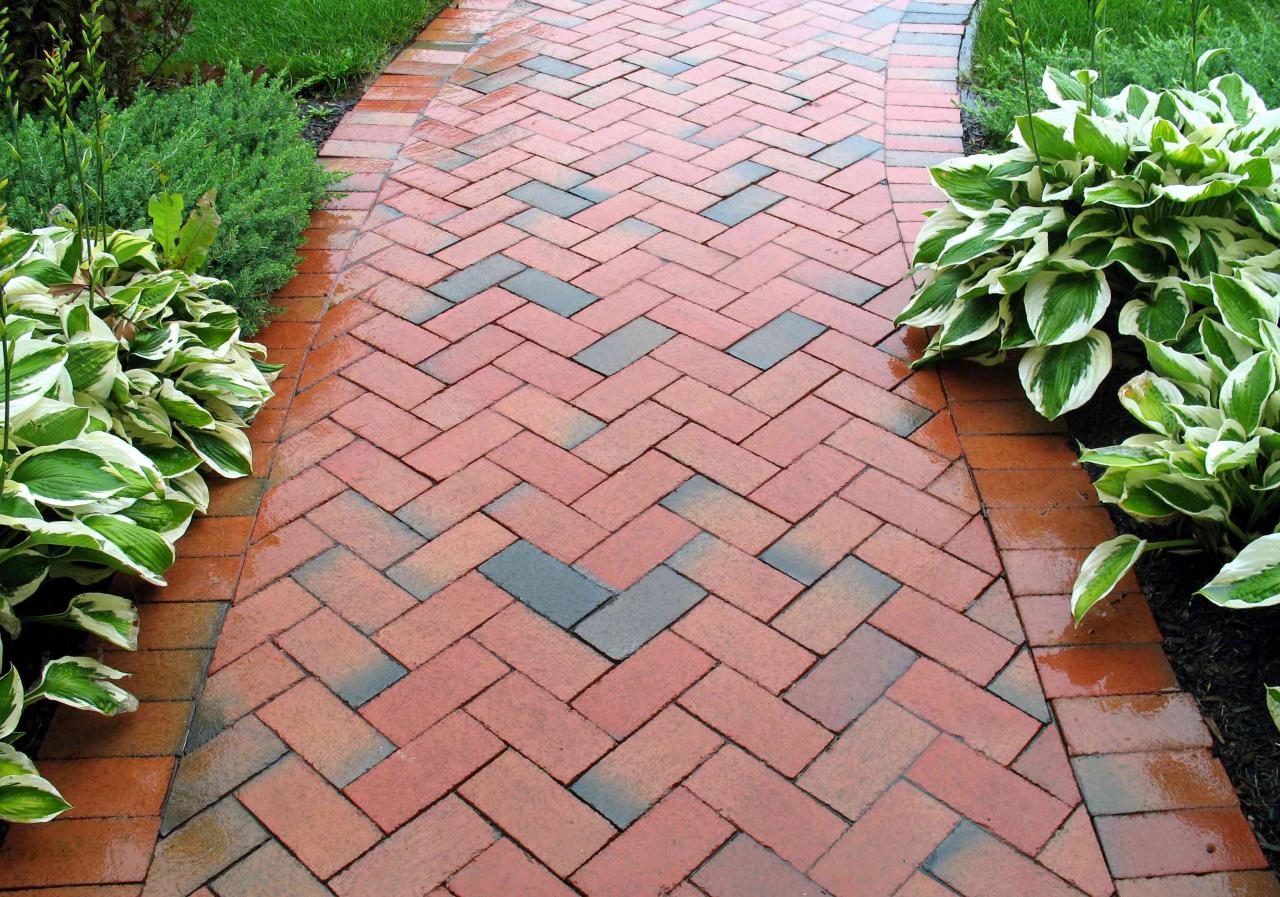
Paver Patterns and Arrangements
Various patterns such as herringbone, running bond, basketweave, and others can add visual interest. The chosen pattern should complement the overall style and shape of the walkway.
Incorporating Landscaping Elements

Source: pinimg.com
Plants and other landscaping elements can enhance the aesthetic appeal of a paver walkway. Consider using low-growing groundcovers, border plants, or strategically placed shrubs to create a cohesive and visually pleasing landscape.
Paver Walkway Cost and Budgeting
The cost of a paver walkway varies depending on several factors. Creating a realistic budget is essential for successful project planning.
Cost Breakdown
| Cost Item | Estimated Cost (per sq ft) |
|---|---|
| Materials (pavers, base materials, sand) | $5 – $20 |
| Labor | $5 – $15 |
| Permits (if required) | $50 – $200 |
Note: These are estimated costs and can vary significantly based on location, material choices, and project complexity.
Factors Influencing Cost
Factors influencing cost include material selection, walkway size and complexity, labor rates, and the need for permits. Higher-end materials and complex designs will increase the overall cost.
Creating a Realistic Budget
Create a detailed budget that includes all anticipated costs, adding a contingency of 10-15% to account for unexpected expenses.
Accessibility and Safety Considerations
Designing accessible and safe paver walkways is crucial for ensuring inclusivity and preventing accidents.
Accessibility
To ensure ADA compliance, consider the following: a smooth, stable surface with minimal changes in elevation, appropriate ramp slopes for inclines, and sufficient width for wheelchair access. Clearly defined edges and contrasting colors can enhance visibility for people with visual impairments.
Safety
Slip-resistant pavers should be used, especially in areas prone to moisture. Adequate lighting is essential for nighttime visibility and safety. Proper grading and drainage prevent water accumulation, minimizing slip hazards. Avoid abrupt elevation changes to reduce tripping hazards.
Improving Walkway Stability
Proper base preparation, including adequate compaction, is essential for walkway stability. Using appropriate paver materials and installation techniques minimizes the risk of settling or shifting.
Q&A
What is the lifespan of a paver walkway?
With proper installation and maintenance, a paver walkway can last for decades.
Can I install a paver walkway myself?
Yes, with proper planning and the right tools, DIY installation is feasible. However, for larger or more complex projects, professional installation is recommended.
How often should I clean my paver walkway?
Regular sweeping is recommended, with deeper cleaning (power washing) as needed, usually once or twice a year.
What types of pavers are best for high-traffic areas?
Durable materials like concrete pavers or natural stone are best suited for high-traffic areas.
Are there any permits required for installing a paver walkway?
Permit requirements vary by location. Check with your local authorities before beginning the project.
Comments are closed.