Yard Pathway Designs
Yard pathway designs transform ordinary yards into inviting outdoor spaces. From the selection of materials like brick, stone, or gravel, to the creative layout and integration of lighting, pathways offer both functional access and aesthetic enhancement. This guide explores various design styles, practical installation techniques, maintenance strategies, and budget considerations to help you create the perfect pathway for your yard.
We’ll delve into the pros and cons of different paving materials, offering a detailed comparison to aid your decision-making process. We’ll also examine various design styles, from formal and symmetrical layouts to more informal, meandering paths, and explore how to incorporate landscaping elements for a cohesive and visually appealing result. Finally, we’ll address safety aspects, including lighting and accessibility, to ensure your pathway is both beautiful and functional.
Pathway Materials: Yard Pathway Designs
Choosing the right material for your yard pathway is crucial for both aesthetics and longevity. The best option depends on your budget, desired aesthetic, and the level of maintenance you’re willing to undertake. Below, we compare several popular pathway materials, detailing their pros and cons and installation considerations.
Material Comparison: Brick, Stone, Gravel, Concrete, and Wood
The following table provides a comparison of common pathway materials across key factors.
| Material | Cost | Durability | Maintenance | Aesthetic Appeal |
|---|---|---|---|---|
| Brick | Medium to High | High | Medium (weeding, occasional repairs) | Classic, versatile |
| Stone (Natural or Pavers) | Medium to High | High | Low to Medium (depending on type) | Natural, elegant, varied styles |
| Gravel | Low | Medium (can shift or compact) | Medium (weed control, occasional replenishment) | Rustic, natural, permeable |
| Concrete | Low to Medium | High (durable but prone to cracking) | Low (occasional cleaning, crack repair) | Clean, modern, customizable |
| Wood (Sleepers or Planks) | Medium | Medium (susceptible to rot and insect damage) | High (regular treatment, replacement) | Rustic, warm, natural |
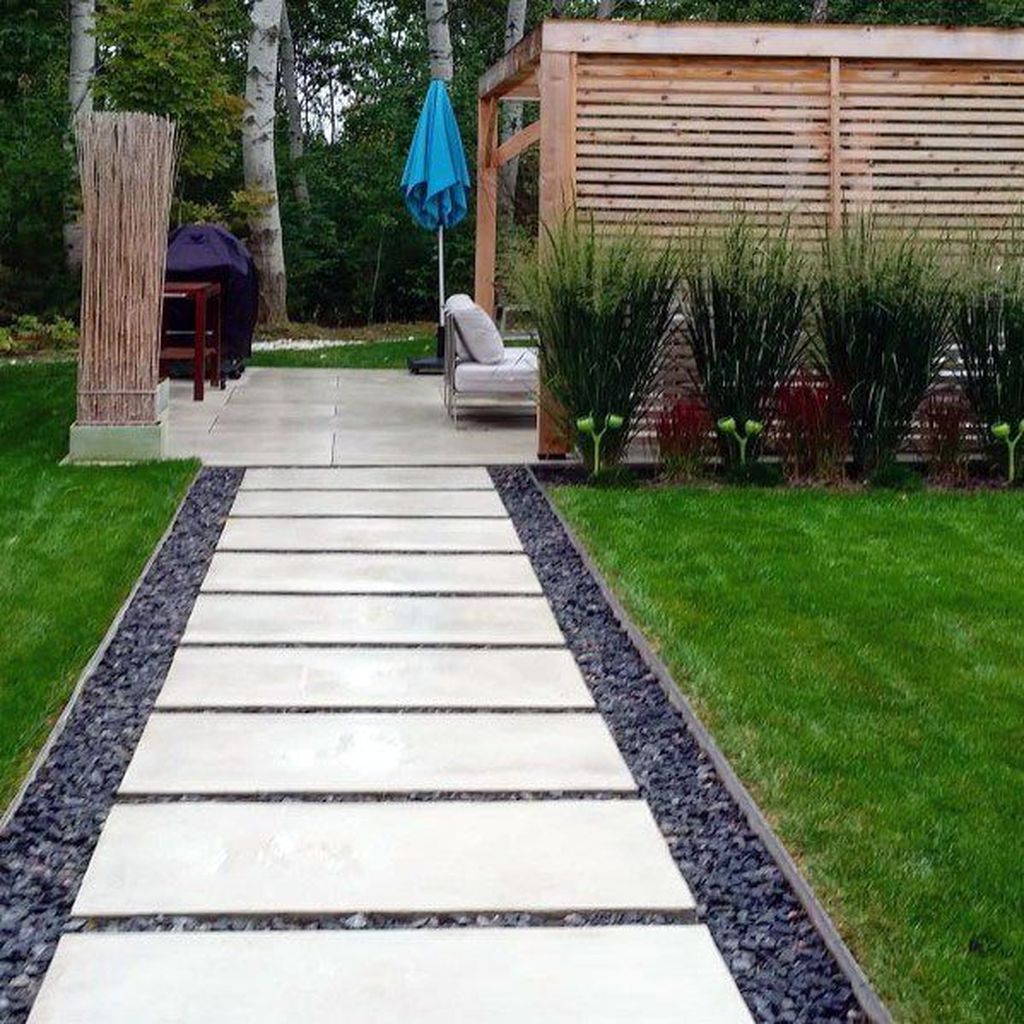
Gravel Pathway Installation
Installing a gravel pathway involves several key steps to ensure proper drainage and weed control. Careful preparation is essential for a long-lasting and attractive result.
- Site Preparation: Clear the area of vegetation and level the ground. Consider the slope for proper drainage.
- Edge Restraint: Install edging (e.g., landscape timbers, metal edging) to prevent gravel from spreading.
- Weed Barrier: Lay down a landscape fabric to suppress weed growth. Overlap edges for thorough coverage.
- Gravel Base: Add a layer of compacted gravel (e.g., crushed stone) for a stable base. This improves drainage.
- Top Layer: Spread the desired top layer of gravel. Choose a size and color that complements your landscape.
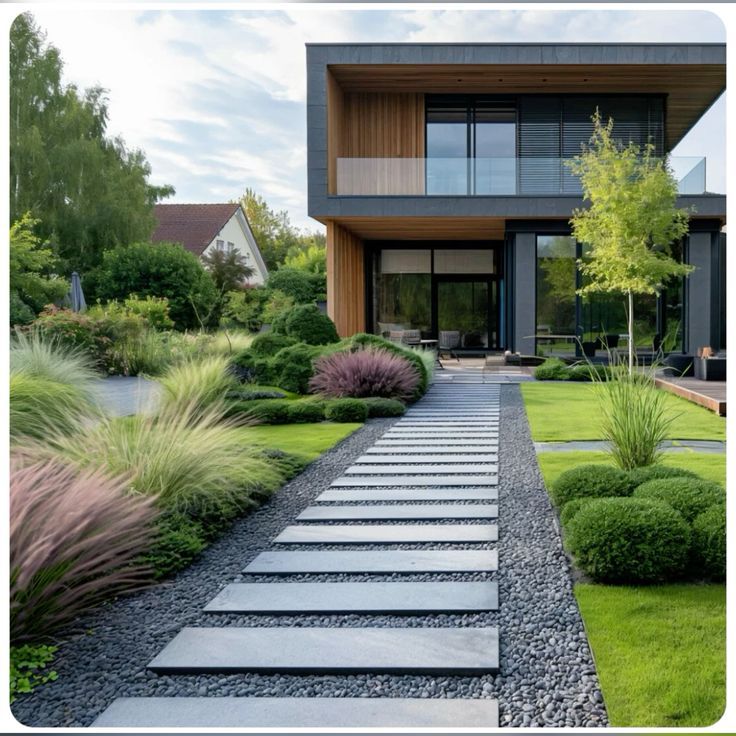
Paving Stone Types and Suitability
Various paving stones offer diverse aesthetics and performance characteristics, making them suitable for different pathway styles.
- Concrete Pavers: Durable, versatile, and available in a wide range of colors and textures.
- Natural Stone Pavers: Offer a unique, natural look; options include flagstone, slate, and granite. Durability varies depending on the type of stone.
- Brick Pavers: Classic and durable, offering a timeless aesthetic. Require more precise installation.
Pathway Design Styles
Pathway design significantly impacts the overall yard aesthetic. Consider the size of your yard and desired style when planning your pathway layout.
Pathway Layouts for Different Yard Sizes
The following Artikels three different pathway designs for small, medium, and large yards.
- Small Yard: A simple, straight pathway leading to the main features, possibly with a slight curve to add visual interest.
- Medium Yard: A branching pathway system, with a main path and smaller paths leading to different areas of the yard. Incorporate gentle curves.
- Large Yard: A more elaborate design with multiple intersecting paths, curves, and perhaps even a circular element. This allows for exploration and discovery within the yard.
Formal vs. Informal Pathway Designs
Formal and informal designs offer contrasting styles, impacting the overall feel of the yard.
- Formal: Straight lines, symmetrical layouts, and meticulously maintained edges create a structured, elegant look. Think of a classic European garden.
- Informal: Winding paths, irregular shapes, and natural materials create a relaxed, more natural feel. A woodland garden is a good example.
Integrating Landscaping Elements
Incorporating plants, flowers, and water features enhances the pathway’s aesthetic appeal and creates a cohesive landscape design.
- Plants and Flowers: Border the pathway with low-growing plants, flowers, or shrubs to add color and texture.
- Water Features: A small fountain or pond near the pathway adds a calming element and visual interest.
Pathway Lighting and Safety

Source: artsyprettyplants.com
Proper pathway lighting enhances safety and security while adding to the overall ambiance of the yard. Consider various options to suit your needs and aesthetic preferences.
Pathway Lighting Options
Several lighting options can illuminate pathways, each with unique advantages and disadvantages.
- Solar Lights: Convenient and cost-effective, requiring no wiring. However, their brightness may be limited, and they rely on sunlight.
- Path Lights: Provide consistent, brighter illumination and can be customized to match the pathway’s style. Require electrical wiring.
- Uplights: Highlight trees or other landscaping features, creating a dramatic and visually appealing effect. May require professional installation.
Creating Safe and Accessible Pathways

Source: walmartimages.com
Designing pathways with accessibility in mind ensures everyone can enjoy them safely and comfortably.
- Smooth, even surfaces: Avoid uneven surfaces that could cause tripping hazards.
- Adequate width: Ensure the pathway is wide enough to accommodate wheelchairs and other mobility aids.
- Good lighting: Provide ample lighting to improve visibility, especially at night.
- Handrails or supports: Consider adding handrails or other supports where necessary, particularly on inclines.
Use of Reflective Materials
Reflective materials significantly enhance pathway visibility at night, improving safety and security.
- Reflective paint or markers: Can be applied to pathway edges or surfaces to increase visibility.
- Reflective stones or gravel: Some gravel types incorporate reflective materials, enhancing visibility at night.
Pathway Maintenance and Repair
Regular maintenance and prompt repairs extend the lifespan of your pathway and maintain its aesthetic appeal. A proactive approach prevents more extensive and costly repairs later.
Concrete Pathway Crack Repair
Repairing cracks in concrete pathways is crucial to prevent further damage and maintain structural integrity.
- Clean the Crack: Remove any loose debris and clean the crack thoroughly.
- Apply Crack Filler: Use a suitable crack filler, following the manufacturer’s instructions.
- Smooth and Finish: Smooth the filler to match the surrounding concrete surface.
Regular Maintenance Tasks
Routine maintenance keeps your pathway looking its best and extends its lifespan.
- Weeding: Regularly remove weeds to prevent them from damaging the pathway surface.
- Cleaning: Sweep or wash the pathway to remove dirt, leaves, and other debris.
- Resealing (for porous materials): Apply a sealant to protect the pathway from water damage and weathering.
Pathway Maintenance and Repair Checklist
Source: pinimg.com
Gather the necessary tools and materials before starting any maintenance or repair project.
- Tools: Broom, shovel, wheelbarrow, sealant applicator, patching tools (for concrete repairs).
- Materials: Crack filler, sealant, gravel (if needed), weed killer.
Pathway Aesthetics and Creativity
Source: pinimg.com
A well-designed pathway can transform your yard, adding both visual appeal and functionality. Consider incorporating themes, colors, textures, and thoughtful integration with the overall landscape.
Themed Pathway Design: Japanese Garden
A Japanese garden-themed pathway evokes tranquility and serenity. Imagine a pathway using natural stone pavers in muted earth tones, bordered by carefully chosen plants like bamboo, moss, and ferns. Subtle lighting, perhaps using strategically placed lanterns, would complete the ambiance.
Using Color and Texture
Color and texture create visual interest and depth in pathway design. For instance, contrasting colors in paving stones can define sections or create patterns. Varying textures through different materials adds visual richness.
Pathway Integration into Landscape Design
A successful pathway design flows naturally with the overall yard landscape. Consider the existing features, such as trees, flowerbeds, and structures, to ensure a harmonious and visually pleasing design. The pathway should guide the eye and create a sense of continuity and purpose.
Budgeting and Planning for a Pathway Project
Careful planning and budgeting are essential for a successful pathway project. Consider all costs and obtain necessary permits to avoid unexpected expenses or delays.
Sample Pathway Project Budget, Yard pathway designs
This table provides a sample budget; actual costs will vary depending on location, materials, and labor.
| Item | Estimated Cost |
|---|---|
| Materials (gravel, pavers, etc.) | $500 – $2000 |
| Labor (if hiring professionals) | $500 – $3000 |
| Permits and Fees | $50 – $200 |
| Tools and Equipment (rental or purchase) | $50 – $200 |
Pathway Project Planning Steps
- Design and Planning: Determine the pathway’s layout, materials, and desired aesthetic.
- Budgeting: Estimate costs for materials, labor, and permits.
- Material Acquisition: Purchase necessary materials.
- Permitting: Obtain any required permits from local authorities.
- Installation: Install the pathway, following proper techniques.
Obtaining Necessary Permits
Source: walmartimages.com
Contact your local building department or planning office to determine if permits are required for your pathway project. They can provide information on the application process and necessary documentation.
Commonly Asked Questions
What is the average lifespan of a gravel pathway?
The lifespan of a gravel pathway varies depending on factors like weather conditions, usage, and maintenance. With proper installation and regular maintenance, a gravel pathway can last for several years, but it may require periodic replenishment of gravel.
How can I prevent weeds from growing in my pathway?
Pre-installation weed control is crucial. Use a landscape fabric as a base before adding gravel or other materials. Regular weeding and the use of herbicides (if desired and permitted) can help manage weed growth.
What are some cost-effective pathway lighting options?
Solar-powered path lights are a budget-friendly and environmentally conscious choice. LED pathway lights are also energy-efficient and relatively inexpensive to purchase and operate.
How wide should my pathway be for accessibility?
For optimal accessibility, pathways should be at least 36 inches (3 feet) wide to accommodate wheelchairs and other mobility devices. Wider pathways are even better for easier passage.
Can I build a pathway myself, or should I hire a professional?
Whether you can build a pathway yourself depends on your DIY skills and the complexity of the design. Smaller, simpler pathways are often manageable for DIY enthusiasts, while larger or more complex projects may benefit from professional installation.
Comments are closed.